Baked Eggs with Chickpeas

To continue my slow return to ‘Healthy not Hard’ recipes (that is, recipes I’ve previously refrained from sharing as I feared they’re so simple no one would be interested in them), I’m sharing this very simple baked eggs dish.


This is something I make regularly for any meal of the day. This is the basic recipe, but you can add extra veg (grated zucchini or left over roast sweet potato is a favourite of mine, but so many veggies work here) to the sauce to make it even more nutritious and delicious. Although it only takes about 15 minutes from start to finish to make, I do sometimes make a veggie-packed version of the sauce for the freezer to whip out on busy nights, popping it in the pan to cook and adding the eggs just before serving whenever something (usually around 3 years old) needs me more than I need to make a more complex meal.

The garlic yoghurt is delicious, but can be replaced by feta (or cashew cheese to keep it dairy free). If you don’t like eggs it’s also delicious with some seafood popped on the top - salmon, prawns or white fish would be my pick, and add some lemon if you go down that route.

Scroll to the bottom to find the recipe card which you’ll also find in my newsletter (sign up here), or you can screenshot below. They’re also great for pinning to Pinterest (which I’ve returned to as well).

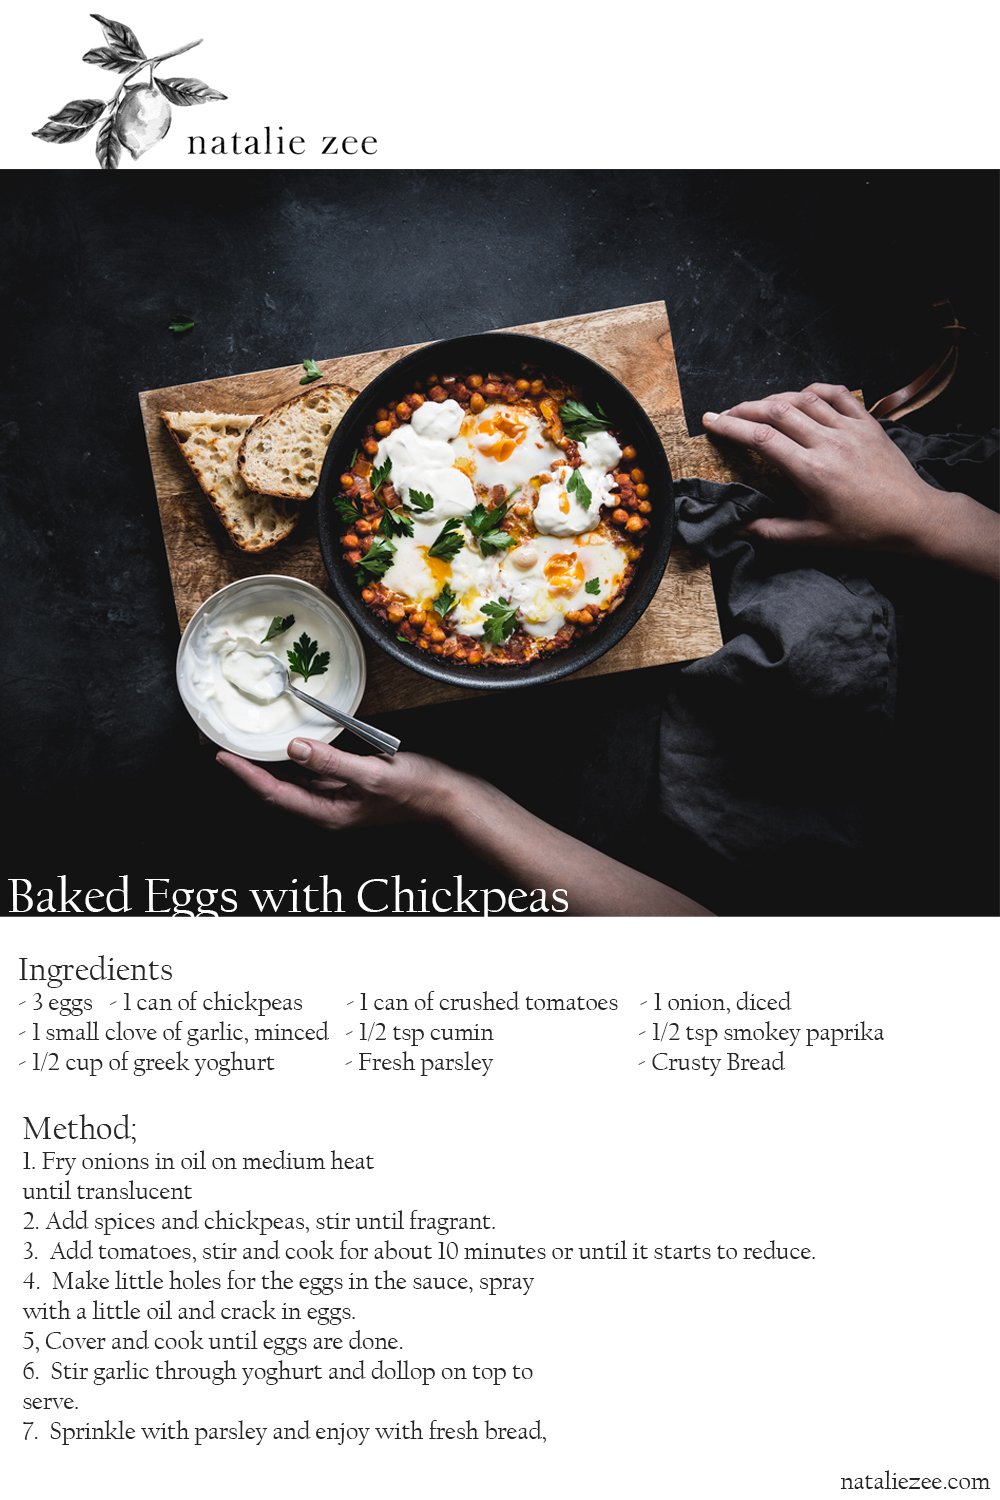
BAKED EGGS WITH CHICKPEAS
Serves - 2-3 / Prep time - 5 minutes / Cooking time - 10 minutes

Ingredients
- 3 eggs
- 1 can of chopped or crushed tomatoes
- 1 can of chickpeas, drained
- 1 onion, diced
- 1/2 a tsp of cumin powder
- 1/2 a tsp of smokey paprika
- 1/2 a cup of Greek yoghurt
- 1 small clove of garlic, minced
- Parsley and fresh crusty bread, to serve.

Method
1.
In a medium-sized fry pan, fry the onion in a little olive oil over medium heat until translucent.

2. Add the spices and chickpeas, stirring until fragrant (about a minute)

3. Add the canned tomatoes with a splash of water and cook for 5-10 minutes on a low heat, or until it starts to reduce and deepens in colour.

4. Make 3 small wells in the chickpea mixture, pour in a little olive oil and crack one egg into each.

5. Cook on a medium heat, covered, for 3-4 minutes or until the eggs are cooked to your liking.

6. Meanwhile mix the garlic with the yoghurt and season to taste.

7. Once the eggs are cooked, dollop the garlic yoghurt on top, sprinkle over some fresh parsley and serve with crusty bread.


Enjoy!

'

And here’s the recipe card I was talking about which I hope you like (i’d love to hear your thoughts on this and whether you find it useful / if you use Pinterest!).

I can’t tell you how much fun it was to create and capture this. I’m not posting often, but I so love it when I create and share something with you. I love cooking super simply, I always have, and I know that prior to having Alexander when I was working to win as many jobs as I could, that I veered off the path of what I truly love onto the path of what I-thought-everyone-else-would-love.

It’s good to be home and share Healthy, not Hard with you again.

Thank you for reading and for your beautiful support,
Nat x

'MINESTRA'

I love Minestrone.  When I was a child, I am told I would eat two big bowls of it (while my little brother had to be distracted by playing with boats in a water tub because he hated all things except peanut butter sandwiches without crusts and mashed potato).  As an adult?  I do the same.

Everyone has their own minestrone recipe, and truthfully, I never do the same thing twice and believe Minestrone can be made out of the vegetables that haven't been used yet at the end of the week (I endorse this fully, less waste!), but this recipe is my ideal situation and my perfect mix.

The only 100% necessary constant for me?  Pumpkin.  And the soup MUST be cooked until the pumpkin has disintegrated to make it thick and decadent.

Yes, vegetables in soup is decadent to me.  

So here it is - my Minestrone, or, as Nonna calls it, 'Minestra'

(stay tuned for the behind the scenes snaps & styling tips at the bottom).

NATALIE ZEE MINESTRONE SOUP RECIPE

The best part about Minestrone?  

It's all chop-chop-chop and throw in a pot.

BLOG MINESTRONE NATALIE ZEE RECIPE

NATALIE'S MINESTRA

You will need;
- 1/2 a medium sized pumpkin, chopped into small-ish cubes
- 1 large white potato, diced larger than the pumpkin
- 2 sticks of celery, sliced
- 1/4 of a cabbage, shredded roughly (with a knife will do)
- 1 head of broccoli, chopped roughly (including stem)
- 2 garlic cloves, peeled and roughly chopped
- 1 can of the best quality crushed tomatoes you can get
- About 150gms of pasta of your choice (my choice?  Always thin spaghetti).
- 1 can of cooked chickpeas, rinsed and drained
- Fresh herbs (oregano or basil) or dried oregano.
- Parmesan cheese, and the rind if possible (or this is a great time to use that left over rind).

To make it;
1. Pop all of the ingredients except for the chickpeas and pasta in a pot and top with water.  Include your parmesan rind too, if you have one.

2.  Bring to the boil and then simmer - most likely for about 90 minutes, or until the pumpkin is mushy (important!).

3.  Add the chickpeas and pasta (and a little extra water, if needed, as the pasta will absorb a lot), and cook until the pasta is al dente (or, 'all dental', if my spell check is to be trusted).

4.  To serve, season to taste and top with even more parmesan cheese, grated on top.

(My Nonna likes to make it with a fresh chilli inside so the heat works through the soup, which is delicious, but the chillies I have at the moment are too hot for it!)
 

BLOG MINESTRONE NATALIE ZEE RECIPE

I thought it would also be fun to start sharing a few behind the scenes snaps (just from my phone, nothing fancy), with each post.  So, see below (and you're always welcome to ask me questions via Insta DM or email - natalie@nataliezee.com, and I'll do my best to answer them in future posts).

MINESTRONE-BEHIND-THE-SCENES-NATALIE-ZEE.jpg

And finally, as I'm not into eating cold food, and therefore super passionate about photographing food the day after (as this was), my top tip for photographing soup the day after without having to heat it?

Mix extra water through it to get it's warmed consistency before you put it in the bowls, and once it's in the bowl, spray the top with water if anything looks a bit dry.

(I'll be sharing more tips on my newsletter over coming months - if you'd like to be included, head here).

Don't forget to tag me (@natalie.zee) or email me if you give this recipe a try, I'd love to see it & share it on my stories!

And what were the three ingredients not pictured?  Canned tomatoes, cheese rind & chickpeas!

Thanks for reading,

Nat x